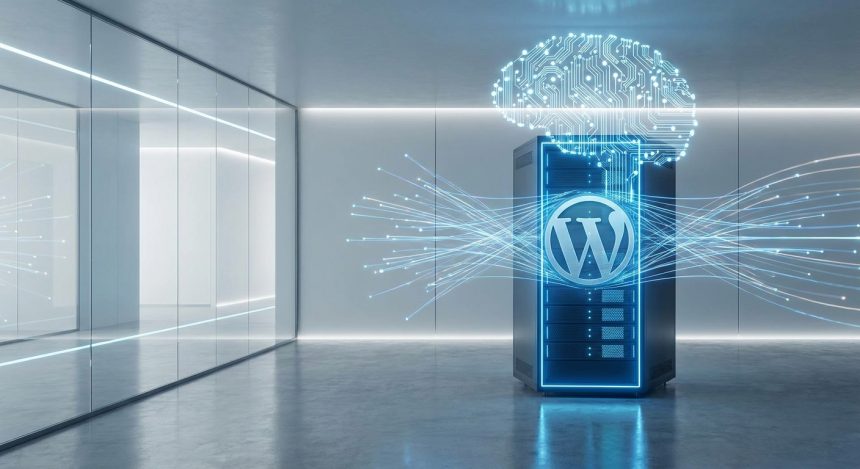
If you're here, it's because the idea of having your own website excites you, and you've heard about the ease and power of WordPress. The good news is that the WordPress installation is a much simpler process than you imagine, especially with the right tools and good hosting. At Biblioweb, we will guide you step-by-step so that your site not only works but shines, even with the demands of artificial intelligence. Get ready to build your digital corner with confidence and exceptional performance.
Before starting
To ensure a smooth and seamless experience during WordPress installation, it's important to have some key elements ready and at hand. Think of this as the ingredient list before cooking a delicious recipe. Having everything ready will save you time and potential frustrations, allowing you to concentrate on each step of the process with complete peace of mind. Let's get to it.
- Registered domain: You should already have your website name (e.g., `biblioweb.com`) purchased and registered in your name.
- Access to your hosting control panel: You will need the credentials to access your cPanel, Plesk, or the administration panel provided by your hosting provider.
- Stable internet connection: It seems obvious, but a good connection is vital for downloading files and browsing without interruptions.
- A coffee or your favorite drink: Stay hydrated and energized. This is an exciting journey.
Basic knowledge of navigating the
The duration of the WordPress installation can vary. If you use an auto-installer, you could have it ready in less than 30 minutes. For a manual installation, or if you encounter a small obstacle, it could take between 45 and 90 minutes. The difficulty level is Beginner-Intermediate; you don't need to be a programmer, just follow the instructions carefully.
Step 1: Choosing the Right Hosting for WordPress with AI
Choosing hosting is, without exaggeration, one of the most critical decisions for your WordPress site's performance, especially if you plan to integrate artificial intelligence functionalities. AI, whether for content optimization, data analysis, or chatbots, consumes resources. Powerful hosting is the foundation for your site to not only load quickly but also support these advanced tools without slowing down. A good provider will offer you the stability, speed, and scalability necessary for an ambitious project. Do not underestimate this step; it is the investment that will protect your digital future.
- Types of Hosting:
- Shared: Economical, good for starting, but limited in resources. Not ideal for large-scale AI.
- VPS (Virtual Private Server): More resources and control. A good starting point for projects with moderate AI.
- Dedicated: A complete server for you. Maximum performance and control, excellent for intensive AI.
- Cloud Hosting: Scalable, flexible, and pay-as-you-go. Ideal for projects with fluctuating AI needs.
- Key factors for AI:
- NVMe SSD: Ultra-fast solid-state drives for quick data access.
- RAM and CPU: Sufficient resources to process AI algorithms. Minimum 4GB RAM, preferably 8GB+.
- Server location: Close to your target audience to reduce latency.
- Technical support: Essential for solving complex problems that may arise with AI integrations.
- Scalability That your hosting can grow with you as your AI needs increase.
Tip: Look for providers that mention WordPress optimization and, if possible, compatibility with AI workloads. Some offer specific plans for 'machine learning' or 'intensive processing'.
How to verify it worked: You will have chosen a hosting plan that aligns with your current and future needs, considering AI integration, and you will have contracted it with a trusted provider.
Step 2: Register Domain and Purchase Hosting (If you haven't already):
If you don't have your domain and hosting yet, now is the time. The domain is your house address on the internet, and hosting is the land where you will build that house. Choosing a good domain name is crucial for your brand, while robust hosting ensures your site is accessible, fast, and secure. Many hosting providers offer the option to register the domain at the same time you contract the service, simplifying the process in a single step. Make sure the name is easy to remember and relevant to your niche.
- Select a domain registrar: You can use the same hosting provider or a specialized one.
- Check your domain's availability: Try different combinations until you find the ideal one.
- Purchase the hosting plan: Based on your performance needs and the AI considerations from Step 1.
- Configure the DNS: If your domain and hosting are from different providers, you will need to point your domain's DNS to your hosting's name servers. Your provider will give you the exact instructions.
Warning: DNS changes can take up to 48 hours to fully propagate worldwide. Be patient.
How to verify it worked: You will receive confirmation emails for both the domain purchase and the hosting service activation, and you will be able to access the hosting control panel.
Step 3: Accessing Your Hosting Control Panel (cPanel or similar):
Once your hosting is active, the next step is to access its control panel. This is the command center of your server, from where you will manage all aspects of your website, including the WordPress installationMost providers use cPanel, a very intuitive and popular graphical interface. Others may offer Plesk or a proprietary panel. Your hosting provider will have sent you an email with the access URL, your username, and your password. Store these credentials in a safe place.
- Look for the welcome email: It will contain the access URL (e.g., `yourdomain.com/cpanel` or a specific IP).
- Enter your credentials: Username and password provided by your hosting.
- Familiarize yourself with the interface: Explore the different sections like 'Files', 'Databases', 'Domains', 'Software' (where you'll find the auto-installer).
Tip: If it's your first time, take a moment to navigate through the different sections. You don't need to understand everything immediately, but knowing where the basic things are will be useful.
How to verify it worked: You will be inside your hosting control panel, seeing all the administration options available for your server.
Step 4: The Ease of WordPress Installation with Auto-installers
The quickest and easiest way to perform the WordPress installation is by using an auto-installer. Tools like Softaculous or Fantastico De Luxe come pre-installed in most cPanels and allow you to install WordPress with just a few clicks. These installers automate the entire process, from database creation to file configuration, which is ideal for beginners. It's a method that saves a lot of time and reduces the possibility of technical errors, allowing you to have your site online in minutes and start working on your content immediately.
- Locate the auto-installer: Inside your cPanel, look for a section called 'Software' or 'Scripts' and click on the 'WordPress' or 'Softaculous Apps Installer' icon.
- Click 'Install Now': A form with several options will open.
- Configure the installation details:
- Protocol: Choose `https://` if you have SSL activated (highly recommended!).
- Domain: Select your domain.
- Directory: Leave this field empty if you want WordPress to be installed directly on your main domain (e.g., `yourdomain.com`). If you put it in a subdirectory (e.g., `blog`), it will be accessed via `yourdomain.com/blog`.
- Site name and description: Give your website a title and a brief description. You can change them later.
- Admin username and password: Create secure credentials and write them down! These are for accessing the WordPress panel.
- Admin email: Enter a valid email.
- Click 'Install': The auto-installer will do the rest. It may take a couple of minutes.
Tip: Make sure to choose a unique and strong administrator username and password. Avoid 'admin' as a username for security reasons.
How to verify it worked: Upon completion, the installer will show you a success message with two links: one to your website and another to the WordPress administration panel (e.g., `yourdomain.com/wp-admin`). You will be able to access both.
Step 5: Manual WordPress Installation for Total Control (Optional, for advanced users):
Although auto-installers are great, the WordPress installation manual installation gives you deeper control over the process. It's ideal if your hosting doesn't have an auto-installer, or if you prefer to understand each step. This method involves downloading WordPress, creating a MySQL database, and uploading the files via FTP. Don't be scared, it's not as complicated as it sounds and will offer you valuable insight into how WordPress works. It's a useful skill that will set you apart and give you more confidence in managing your website.
- Download WordPress: Go to wordpress.org and download the latest version of the .zip file.
- Create a MySQL database:
- In your cPanel, find the 'Databases' section and click on 'MySQL Databases'.
- Create a new database (e.g., `wp_mywebsite`).
- Create a new MySQL user (e.g., `wp_user`) and assign a strong password.
- Add the user to the database and grant 'All privileges'. Note down the database name, username, and password.
- Upload the WordPress files:
- Unzip the WordPress .zip file on your computer.
- Use an FTP client (like FileZilla) or cPanel's 'File Manager' to upload all WordPress files and folders to the `public_html` directory (or the subdirectory where you want to install it).
- Configure `wp-config.php`:
- Rename the `wp-config-sample.php` file to `wp-config.php` inside the WordPress directory on your server.
- Edit this file (you can do it from cPanel's 'File Manager') and enter your noted database details: `DB_NAME`, `DB_USER`, `DB_PASSWORD`.
- Generate unique security keys at WordPress Salt Generator and paste them into the file.
- Save the changes.
- Run the installation: Open your browser and go to `yourdomain.com` (or `yourdomain.com/subdirectory`). You will be redirected to the WordPress welcome page to complete the installation.
- Fill in the details: Enter the site title, administrator username and password, and your email.
Warning: Make sure file and folder permissions are correct (generally 644 for files and 755 for folders) to avoid security and functionality issues.
How to verify it worked: Upon completion, you will be redirected to the WordPress administration panel, ready to log in.
Step 6: Initial WordPress Configuration
Once the WordPress installation basic installation is complete, it's time to perform the initial settings so your site starts to take shape and become functional. These steps are fundamental for establishing your website's identity, optimizing it for search engines from the beginning, and ensuring an adequate user experience. Do not skip these configurations, as they lay the groundwork for the future growth of your digital project. Dedicate a few minutes to each section to ensure everything is to your liking.
- Access the administration panel: Go to `yourdomain.com/wp-admin` and enter your credentials.
- General Settings: Go to 'Settings' > 'General'.
- Site Title and Tagline: If you didn't do it before, define them here. They are important for SEO.
- WordPress Address (URL) and Site Address (URL): Make sure they are correct (with `https://`).
- Timezone, Date and Time Format: Adjust according to your location.
- Reading Settings: 'Settings' > 'Reading'.
- Search engine visibility: Make sure the 'Discourage search engines from indexing this site' box is NOT checked, unless you want your site to be private for now.
- Permalink Settings: 'Settings' > 'Permalinks'.
- Choose 'Post name'. This creates clean and SEO-friendly URLs (e.g., `yourdomain.com/your-article-name`).
Tip: Configuring permalinks at the beginning is crucial. Changing them later can negatively affect your site's SEO.
How to verify it worked: Upon saving the changes, your site will reflect the new title, description, and your page and post URLs will be SEO-friendly.
Step 7: First Steps Post-Installation: Essential Plugins and Optimization
With your WordPress installed and configured, it's time to enhance it with plugins that will improve its functionality, security, and performance. Choosing the right plugins is vital, especially if you plan to integrate advanced AI functionalities. Think of them as tools that add superpowers to your site. Don't install too many, but make sure you have the essential ones for a modern and efficient site. These plugins are key to making your site not only work but also help you achieve your goals.
- Security Plugins:
- Wordfence Security or Sucuri Security: They protect your site against malicious attacks, spam, and vulnerabilities.
- SEO Plugins:
- Yoast SEO or Rank Math: Essential for optimizing your content for search engines, generating sitemaps, and managing meta descriptions. Learn how to configure Yoast SEO for beginners.
- Performance/Cache Plugins:
- WP Rocket, LiteSpeed Cache or W3 Total Cache: They drastically improve your site's loading speed, which is critical for user experience and SEO, and even more important for sites with AI integrations.
- Backup Plugins:
- UpdraftPlus or Duplicator: To perform automatic backups of your site and database. Essential!
- Plugins for AI Integration (examples):
- AI Content Detector or AI Writing Assistant: To help you with content creation or verification.
- Chatbot plugins: To integrate virtual assistants into your site.
Tip: Before installing a plugin, check its compatibility with the latest WordPress version, other users' reviews, and its update frequency. An outdated plugin can be a security risk.
How to verify it worked: You will have installed and activated the essential plugins. You can verify their basic functionality by visiting your site and checking the loading speed or reviewing their individual settings.
Step 8: Verification and Additional Security
The security of your WordPress site is an aspect that should never be overlooked. After the WordPress installation and initial setup, it is crucial to implement additional measures to protect your investment and your users' information. A secure site not only prevents attacks but also builds trust with your audience and improves your online reputation. Furthermore, ensuring everything is working correctly is the finishing touch before you start creating content.
- SSL Installation and Configuration:
- If your hosting offers a free SSL certificate (like Let's Encrypt), make sure it's activated and working.
- If not, consider acquiring one. An `https://` site is essential for security and SEO.
- Use a plugin like ‘Really Simple SSL’ to force the redirection of all your traffic to `https://`.
- Initial Backup:
- Perform a complete backup of your site right after installation and basic configuration. This will serve as a restore point if something goes wrong in the future.
- Change the Admin Panel Login URL (Optional):
- Consider changing `wp-admin` or `wp-login.php` to a custom URL to make brute-force attacks more difficult. Plugins like 'WPS Hide Login' can help you with this.
Notice: Never underestimate the importance of backups. They are your digital lifeline. Set up automatic and regular backups.
How to verify it worked: Your site will load with `https://` in the browser's address bar, and you will have a recent backup saved in a safe place.
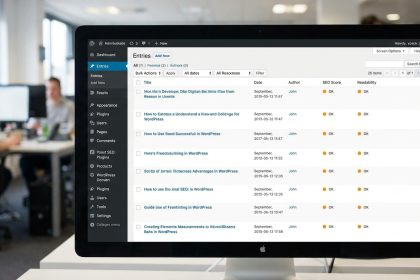
Step 9: Exploring the WordPress Panel and Next Steps
Congratulations! You have completed the WordPress installation and your site is ready to shine. Now is the time to familiarize yourself with the WordPress administration panel, your operations center for managing all your website's content and functionalities. Take some time to explore each section. This knowledge will empower you to customize your site, publish content, and take your project to the next level. Remember, practice makes perfect, and every click will bring you closer to mastering your platform.
- Dashboard: Site overview, updates, quick drafts.
- Posts: Here you will create your blog articles, news, and tutorials.
- Media: To upload and manage images, videos, and other files.
- Pages: To create static content like 'About us', 'Contact', 'Services'.
- Comments: Moderate and respond to your users' comments.
- Appearance: Customize your site's design with themes and widgets.
- Plugins: Manage extensions that add functionalities.
- Users: Manage the roles and permissions of people who access your panel.
- Tools: Import, export content, site status.
- Settings: General settings, writing, reading, comments, media, and permalinks.
Tip: Start by installing a theme (template) that you like and suits your brand. There are thousands of free and paid themes available. Then, create your first post or page.
How to verify it worked: You will have navigated through the different sections of the WordPress administration panel and will feel more comfortable with its interface.
Common problems and solutions
Sometimes, even with the best guide, small inconveniences can arise. Don't worry, most WordPress problems have well-documented solutions. Here are some of the most common ones you might encounter during or after the WordPress installation, along with their practical solutions. The key is to remain calm and approach each problem methodically, always looking for the root cause to apply the correct solution. Remember that you are not alone in this.
- Database connection error:
- 46. Symptom: Your site shows an 'Error establishing a database connection' message.
- Solution: Check the `wp-config.php` file (Step 5) to ensure that the database details (name, user, password, host) are correct. Make sure the database and user exist and that the user has all privileges on the database in cPanel.
- White Screen of Death (WSOD):
- 46. Symptom: Your site shows a completely blank page.
- Solution: This is usually caused by an incompatible plugin or theme. Access via FTP, rename the `plugins` folder (in `wp-content`) to `plugins_old` and the active theme folder to `theme_old`. If the site returns, activate them one by one to find the culprit. You can also activate `WP_DEBUG` mode in `wp-config.php` to see errors.
- Cannot access the administration panel (`wp-admin`):
- 46. Symptom: Error 404 or redirection loop when trying to access `yourdomain.com/wp-admin`.
- Solution: Check file permissions (`.htaccess` might be corrupt). Rename the `.htaccess` file in the root of your installation to `.htaccess_old` via FTP. Then, access the dashboard, go to 'Settings' > 'Permalinks' and simply click 'Save Changes' to generate a new one.
Frequently Asked Questions
Do I need specific hosting to integrate artificial intelligence into my WordPress?
Yes, absolutely. While WordPress can run on almost any hosting, AI functionalities (such as natural language processing, real-time data analysis, or advanced chatbots) are resource-intensive. You will need hosting with greater CPU capacity, RAM, and NVMe SSD disks to ensure optimal performance and prevent your site from slowing down. A VPS or scalable cloud hosting are the best options for these scenarios, as they offer the flexibility and power needed to handle the demands of AI.
Is WordPress installation really difficult for someone without technical knowledge?
Not at all! The WordPress installation has been greatly simplified over the years. Thanks to auto-installers like Softaculous, the process is as simple as filling out a form and clicking 'install'. If you can follow step-by-step instructions, you can install WordPress. The most 'technical' part might be choosing the right hosting or configuring the DNS, but even that is guided by your provider and our detailed instructions.
Can I migrate my WordPress installation to another hosting if I am not happy with the performance?
Yes, of course. Migrating your WordPress site to another hosting is a common and relatively simple practice nowadays. There are numerous migration plugins (like Duplicator or All-in-One WP Migration) that automate much of the process, or you can do it manually if you are comfortable with FTP and databases. Many hosting providers even offer free migration services as part of their plans, facilitating the change and ensuring that your site maintains its performance and configurations.
What happens if my WordPress site with AI starts to run slow after installation?
If your site starts to slow down, especially with AI integrations, there are several points to check. First, your hosting optimization (review CPU/RAM resources). Second, the use of caching plugins and image optimization. Third, the quality of your theme and the optimization of your code. Finally, check if the AI tools you are using are consuming excessive resources and look for lighter alternatives or external processing solutions. A good performance analysis with tools like Google PageSpeed Insights will give you valuable clues.
Conclusion and next steps
You did it! You have successfully completed the WordPress installation of your website, choosing a hosting prepared for the challenges of artificial intelligence. From server selection to initial configuration, you have laid the groundwork for a robust and forward-thinking digital project. This is just the beginning of your adventure with WordPress. Now you have the tool, the power is in your hands to create incredible content and connect with your audience.
What's next? We encourage you to thoroughly explore your WordPress dashboard, install a theme that reflects your brand's personality, and start creating your first posts and pages. On Biblioweb, you'll find many more tutorials and tips to take your site to the next level, from advanced SEO to AI integrations. Don't stop here, your digital journey has just begun!
We invite you to continue exploring our resources at Biblioweb on WordPress optimization y digital marketing strategies. The world of websites awaits you!