Are you ready to take the leap into the world digital world and have your own website up and running in no time? In this comprehensive guide, we will accompany you step by step so that you can install WordPress simply and efficiently. Forget about technical headaches; we promise that, by the end of this tutorial, you will have your site website ready to start create amazing content and connect with your audience. Get ready to build your online presence without complications.
Before you start: Prepare your digital ground!
Before we dive into the process of how to install WordPress, it is crucial that you have some fundamental elements at hand. These prerequisites are the foundation upon which we will build your new website. Make sure you have them ready so that the installation is smooth and uninterrupted. Consider these points as your tools initial.
- Domain and Web Hosting: You need a name for your website (e.g., biblioweb.com) and space on a server where your site will live. If you don't have them yet, this is the indispensable first step.
- FTP Client: Programs like FileZilla will allow you to transfer the files from WordPress from your computer to your hosting server. It is a free and very intuitive tool.
- Hosting Access Data: Generally, your hosting provider will send you an email with your credentials (username, password) to access the control panel (cPanel, Plesk, etc.) and FTP.
- Web Browser: Chrome, Firefox, Edge… any modern browser will work to complete the installation.
Basic knowledge of navigating the
Good news! This process is surprisingly fast. With all prerequisites ready, it will take you This tutorial has a moderate difficulty level and is estimated to take you 15 and 30 minutes install WordPress. It is designed for beginners, so don't worry if you have no prior experience. The difficulty is low, and our detailed guide will walk you through every click.
Step 1: Choose Your Hosting and Register Your Domain
The first pillar of your online presence is selecting a reliable hosting provider and registering a domain that represents your brand or project. Hosting is like the land where your house (your website) sits, and the domain is its address. A good hosting choice guarantees speed and stability, key elements for user experience and SEO. Research options that offer quality technical support and scalability for the future. Many providers allow register the domain directly when contracting the hosting, simplifying the initial process. Make sure to choose a domain name that is easy to remember, relevant to your content, and available. This is a fundamental step before even thinking about how to install WordPress.
- Research hosting providers: Look for reputable companies, such as SiteGround, Raiola Networks, or Webempresa, which offer optimized plans for WordPress.
- Select a hosting plan: Choose the one that best suits your initial needs, considering space, traffic, and features.
- Register your domain: During the hosting contracting process, you will be able to search for and register your preferred domain name.
- Confirm activation: Wait for confirmation from your provider that the hosting and domain are active and configured.
Tip: Some hostings offer automatic installation of WordPress. If this is your case, you can skip many of the following steps, but it's always good to know the manual process.
How to verify it worked: You will receive an email from your hosting provider confirming the activation of your service and the registration of your domain.
Step 2: Download the Latest Version of WordPress
Now that you have your domain and hosting ready, the next step is to get the files for WordPress. It is always recommended to download the latest version directly from the official source to ensure your site has the latest features, improvements in security and compatibility. Avoid downloading WordPress from third-party sites, as they might include malicious code or outdated versions. The file you download will be a compressed package (ZIP) containing all the essential files for WordPress function correctly on your server. This download is quick and leaves you with a manageable file on your computer, ready for the next step on our path to install WordPress.
- Visit the official website of WordPress: Open your browser and go to es.wordpress.org/download/.
- Click on 'Download WordPress': Locate the large button that says 'Download WordPress X.X.X' (where X.X.X is the current version).
- Save the ZIP file: Save the compressed file to a location on your computer that is easy to remember, such as your desktop or a downloads folder.
Warning: Make sure to download the Spanish version if that is your primary language, although it can be can change later.
How to verify it worked: You will have a file named something like wordpress-X.X.X-es_ES.zip on your hard drive.
Step 3: Upload WordPress Files to Your Server (Via FTP)
With the WordPress files on your computer, it's time to transfer them to your hosting server. For this, we will use an FTP client, such as FileZilla. FTP (File Transfer Protocol) is the standard way to move files between your local computer and a remote server. This step is fundamental because it places the 'brain' of WordPress where your domain will can find. You will need to unzip the ZIP file you downloaded in the previous step and then upload all the content of the 'wordpress' folder to your domain's root directory on the server. This is usually public_html o www, depending on your hosting configuration. It is a process that requires patience, as there are many small files.
- Unzip the ZIP file: Right-click on the file
wordpress-X.X.X-es_ES.zipand select 'Extract all' or 'Unzip'. This createwill be a folder called 'wordpress'. - Open your FTP client (e.g. FileZilla): Enter your FTP access details (Host, Username, Password, Port) provided by your hosting.
- Connect to your server: Once connected, you will see two panels: one for your local computer and one for the remote server.
- Locate the root directory: In the server panel, navigate to the folder
public_html(or whatever your hosting indicates as your domain's root). - Upload the files: Drag all the content of the 'wordpress' folder (NOT the 'wordpress' folder itself, but what's inside it) from your local panel to the server's root directory.
Tip: If your hosting offers a File Manager in cPanel, you can upload the ZIP directly and decompress it on the server, which is usually faster.
How to verify it worked: When browsing the root directory of your server in FileZilla, you will see folders like wp-admin, wp-content, wp-includes and files like index.php, wp-config-sample.php.
Step 4: Create Your MySQL Database
WordPress needs a place to store all your site's information: your posts, pages, comments, users, settings, etc. This place is a MySQL database. Without a database, WordPress cannot function. The good news is that create one is a relatively simple process that is done through your hosting control panel (usually cPanel or Plesk). You will need to create the database, assign a user and password to it, and grant that user all privileges over the database. Carefully write down the database name, username, and password, as you will need them in the next step to configure WordPress.
- Access your hosting control panel: Log in to your cPanel, Plesk, or similar panel.
- Find the Databases section: It is generally called 'MySQL Databases' or similar.
- Create a new database: Assign a descriptive name to your database (e.g.
mi_web_db). - Create a new database user: Define a username (e.g.
mi_web_user) and a strong password. - Assign the user to the database: Link the newly created user to the database and grant it 'All privileges'.
Warning: It is CRITICAL that you write down the database name, username, and password. You will need them in the next step.
How to verify it worked: In the MySQL Databases section of your panel, you will see the database listed with the assigned user and their privileges.
Step 5: Run the WordPress Installer
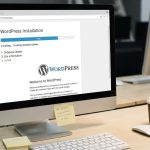
We're almost there! With the WordPress files on your server and the database ready, the next step is to start the WordPress installation process through your web browser. Simply type your domain address in the address bar and WordPress will automatically detect that it needs to be configured. It will guide you through a very intuitive wizard where you will enter the database details you created in the previous step. This wizard is the brain of the operation for install WordPress, connecting the files with the place where your content will be stored. It's an exciting moment, as you are about to see the setup interface of your future website.
- Open your browser: Type your domain URL (e.g.
https://tudominio.com). - Select the language: Choose the language in which you want to install WordPress and click 'Continue'.
- Click on 'Let's go!': WordPress will show you a welcome screen and ask you to click to continue.
- Enter the database details: Fill in the fields with the database name, username, password, and database host (usually
localhost). You can leave the table prefix as default (wp_) or change it to security. - Click on 'Submit': WordPress will try to connect to the database. If everything is correct, it will indicate it.
Tip: If you get a connection error, check your database details. A common mistake is misspelling the password.
Cómo verificar que ha funcionado: Verás un mensaje que dice: “¡WordPress ya puede comunicarse con tu base de datos! Si quieres, puedes ejecutar la instalación ahora.”
Step 6: Configure Your Site's Basic Data
Once WordPress has successfully connected to your database, the installer will ask you for some basic details about your website and your administrator account. This is the last phase before your site is fully functional. Here you will set the title of your website, which will appear in the browser and in search results, and createwill be the administrator username and password, which will be your credentials to access the WordPress control panel. The administrator email is crucial for password recovery and receiving important notifications. Make sure to choose a secure password and a username that is not 'admin' to improve your site's security when installing WordPress.
- Click on 'Run the installation': You will be redirected to the final setup screen.
- Fill in the site details:
- Site Title: Your website name (e.g. Biblioweb).
- Username: Your administrator username (choose a secure one!).
- Password: Create a strong password and write it down.
- Your email: A valid email for notifications and recovery.
- Search engine visibility: Decide if you want search engines to index your site from the beginning. For a new site, it is advisable to leave this box unchecked for now, so that Google does not index an empty or under construction site.
- Click on 'Install WordPress': The final installation process will begin.
Warning: Store your administrator credentials in a safe place! They are the key to your website.
Cómo verificar que ha funcionado: Verás una pantalla de éxito con el mensaje “¡Listo!” y un botón para acceder a tu panel de control.
Step 7: Done! Access your WordPress Control Panel
Congratulations! You have achieved install WordPress successfully. You now have your own functional website. The last step is to access your WordPress control panel, also known as the dashboard or wp-admin. From here, you can manage all your website's content: create posts, pages, install themes, add plugins, moderate comments and much more. It is the command center of your digital project. Take a moment to familiarize yourself with the interface, menus, and available options. Exploration is key to understanding Choosing the payment gateway is one of the most important decisions for your online store. Not the possibilities that WordPress offers you to build an amazing website and 23. dynamic. The journey has just begun!
- Click the 'Log In' button: On the success screen, you will see a button to log in.
- Enter your administrator credentials: Use the username and password you created in the previous step.
- Click on 'Log In': You will be redirected to the WordPress dashboard.
Tip: Save the URL to access your control panel (
https://tudominio.com/wp-admin) in your favorites for quick access in the future.
How to verify that it worked: You will see the WordPress dashboard, with its sidebar menu and content management options.
Common problems and solutions
Sometimes, the path is not so straight. Here are some common problems when trying to install WordPress and how to solve them.
- Database connection error:
- 46. Symptom: “Error al establecer una conexión con la base de datos”.
- Solution: Check the file
wp-config.php(in the root of your installation) to ensure that the database details (name, user, password, host) are correct and exactly match those you created.
- Blank page or 500 error:
- 46. Symptom: Al acceder a tu dominio, ves una página en blanco o un mensaje de “Error Interno del Servidor”.
- Solution: It could be a file permissions issue or an incompatible PHP version. Contact your hosting provider to verify the PHP version and the permissions of the WordPress folders and files.
- CSS styles are not displayed:
- 46. Symptom: Your WordPress site looks unformatted, only text and links.
- Solution: This is usually a permissions problem in the folder
wp-contentor that some files were not uploaded correctly. Re-upload the files if necessary and check permissions.
Frequently Asked Questions
What is WordPress and why should I use it?
WordPress is the most popular content management system (CMS) in the world, powering over 40% of all websites. It is free, open-source, highly customizable, and relatively easy to use. Its large community, the enormous number of themes and plugins available, and its flexibility make it ideal for blogs, online stores, corporate websites, and much more.
Can I install WordPress without paid hosting?
Technically, you can install WordPress on a local server (like XAMPP or WAMP) on your computer for testing and development. However, for your site to be accessible to the public on the internet, you will need web hosting and a domain. There are free hosting options, but they usually have significant limitations and are not recommended for serious projects.
Is it safe to install WordPress myself?
Absolutely! Installing WordPress following the steps correct steps is completely safe. The risk lies in not keeping it updated or not using strong passwords. If you follow this guide and keep your installation up to date, your site will be as secure as any other. The key is diligence and good security practices.
What do I do after installing WordPress?
Once you have WordPress installed, the next step is to customize it. You can choose a theme (visual design), install plugins (additional functionalities like SEO, security, forms), create your first pages and posts, and configure general settings. The world of WordPress is vast and full of possibilities!
Conclusion and next steps
You did it! You have successfully install WordPress and you have taken the crucial first step to build your digital presence. This tutorial has equipped you with the knowledge and confidence to launch your own website, demonstrating that creating a website doesn't have to be an intimidating task. Now that your WordPress is online, the real journey begins. It's time to explore, experiment, and bring your ideas to life.
We encourage you to explore the themes and plugins available, to start creating content that resonates with your audience, and to customize your site to reflect your vision. At Biblioweb, we are here to continue guiding you. Don't forget to check our advanced guides on SEO optimization for WordPress y how to create an online store with WooCommerce. The future of your website awaits!
Frequently Asked Questions
What is Installing WordPress?
Want your first website in minutes? Learn to install WordPress step-by-step, without complications. Start your digital project today! Beginner's guide.
Why is it important to Install WordPress?
It helps you get better results and make informed decisions about Your First Website in Minutes! 🚀 How to Install WordPress EASY and FAST (without breaking a sweat!).
How to get started with Installing WordPress?
Follow the steps described in this article and apply the recommendations according to your case.